SEGO Configuration B - Setup Instructions
Step 1. Set Up Frames
Assemble the frames individually, with the specified quantities outlined below. Refer to the setup instructions provided in the spec sheet and accompanying videos for guidance.
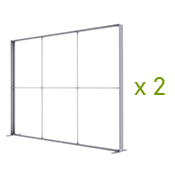
9.8ft X 7.4ft Sego Frame (SEGO-300X225-G)


Step 2. Set Up Graphics

Now, it's time to install the graphics. For this step, the procedure remains consistent across all frames. Tilt the frame over for setup. Begin by inserting the silicone edge inside the frame, starting with the corners, then progressing to the middle edges, and finally extending the remaining silicone inward.
Step 3. Set up Connectors
Locate the connectors above and utilize the diagram and videos below to connect the frames. You might have to loosen a section of the graphics to facilitate certain connections.


 L Connector
Step 4. Wiring Instructions
Here's how you should set up the wiring. Additional 5M wires can be purchased if needed.
Electrical Requirements: Qty: 1 (5 Amps/500 Watts)
